Trinkets!!!

So I got 4 Adafruit Trinkets — 2 3.3V and 2 5V. They were part of a mass order we did at the local hackerspace. I’m really excited. I’ll post more of my world domination plans soon — I don’t have time right now by virtue of it being 10:00 on a Sunday night. 

G’by for now!

Leave a comment

Filed under Uncategorized

First Parts! (Again)

I’ve got a lot today. Unfortunately I haven’t been able to post recently because of school. But, last week, I got bearings, LM8UUs. They’re beautiful. I’ll post pics later. Then, this past weekend, I was able to take apart a printer, from which I got a belt, a rod, a pulley, and 2 steppers; a normal one and a PG35L. Unfortunately, there’s one spot on the casing of the PG35L where you can see the wire inside. My brother found the motor on my shelf, saw the copper wire inside, thought “Ooh! Pretty!”, and tried to take the wire out. He failed to do so, but succeeding in UTTERLY DESTROYING MY PRECIOUS. NOOOOOOOOOOOOOOO!!!!!!!!!!!!! PRECIOUS!!!!!!!!!!!!!!!!!!!!!!! WE HATESES BROTHERS! WE HATESES FOREVER!!!!!!!!!!!!!!!!!!!

Sorry about that. My inner Gollum manifested itself again; pesky Smeagol!. Anyway, As you can probably imagine, I got pretty wound up over that. But it’s all good now.

Anyway, I tried a bearing test after that — which means I put the bearing on the rod. I have no video, but it was basically a complete disaster. The bearing was super tight, and I had to push it to get it to move. I thought “Okay, maybe you have to break in the bearing a little. That’s when I looked at the rod, and saw that the bearing was starting to groove it.

On top of that, I couldn’t even get the bearing off, because both the bearing and the rod were so greasy by this point. I’m not sure if it’ll turn out to be usable.

I’m not even sure if it’s 8mm. The original mechanism from the printer used integrated plastic bushings; they were designed as part of the carriage. Unless I find a way to get those bushings out without breaking them, I don’t know what I’ll do with that rod.

Anyway,

evam out for now.

Bye!

PS — I don’t really hateses my brother forever — but my inner Gollum might!

Leave a comment

Filed under Uncategorized

More Parts!

But, I got more parts; another 7 M8 Nuts, 6 M8 Washers, and 3 M3 Nuts.

Like I said last time, it’s a start, right?

And, I rethought my whole printer plan. 

I’m still in love with the Morgan’s SCARA configuration and simplicity, but now I’m also in love with the simplicity and ridiculously low parts count of the Smartrap (be sure to check the Reprap Wiki page too). I eagerly await the full release of 0.4.

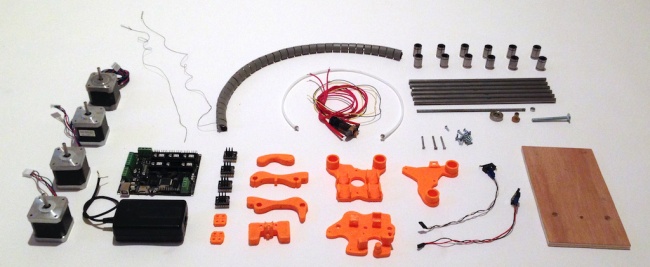
Image

Above you see ALL the parts needed to build your own Smartrap. Amazing, right?

It uses a fishing line drive for the XY axes, but Sergei says he has a rack and pinion version in the works. I can’t wait!

I also now think that this will be my new first printer, because of the lower parts count and cost. But, I’ll immediately set it to work fabricating parts for a Morgan.

I plan to (and encourage you to) contribute to the Smartrap’s Indiegogo campaign as well.


On a different note, I saw a study the other day talking about possible dangerously high Ultra-fine Particle (UFP) emissions from 3D printers. I’ve started to try to figure out how to ventilate my printing area to minimize this effect.  

Anyway, hope your weekend was as awesome as mine was, and Happy Thanksgiving! (if you’re in the US)

Leave a comment

Filed under Uncategorized

Polar Printer Pickup!

Looks like I’m back on the polar printer project…BUT with some changes.

First of all, I’ll continue trying to build a Morgan, while designing this printer to print out once I finish my Morgan.

Also, it’ll now be based more on the R-360 concept from Replicator Warehouse. Of course, I’ll take inspiration from the PiMaker, but I’m really drawn to the R-360’s extremely low vitamin count; I think I could build the whole frame (sans electronics) for under $30.

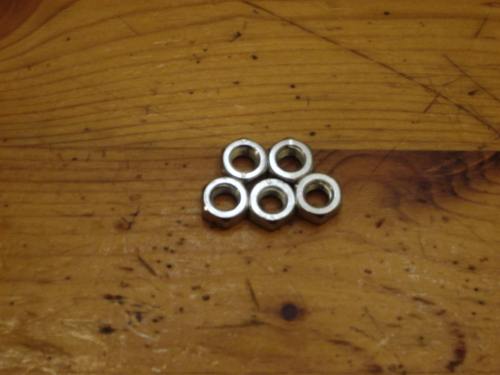
Also on the topic of my Morgan build, I got my first parts finally!Morgan Vitamins M8 Nuts

Yep, you saw right! What you see there are 5 brand-spanking-new stainless steel M8 nuts!

It’s a start, right?


Leave a comment

Filed under Uncategorized

New Scan + Printing Procrastination

I’ve started learning how to 3D scan stuff. I’m really excited about it. I’ve done a couple of 123D Catch scans, and I’m also learning VisualSFM. I just did a penguin scan using Catch, which is now on Thingiverse.

On to the main reason for the post. Remember the mysterious new design I was talking about a couple of weeks ago? I ended up finishing that other variant. I’ll go ahead and reveal that the design was a Hnefatafl board. But, I’m not going to post it quite yet; I’m gonna hold out to print it.

Anyway, sorry this post is so brief; I’m really busy right now.

evamvid out.

Leave a comment

Filed under Uncategorized

Remember that file dump I was talking about? (And more ruminations about a Morgan build)

It looks as though I may be able to get it printed after all. The day I posted about it, I went to post the files — and realized there was another variation of it I had wanted to do, and got caught up in fixing it all up. Well, I finished today, and I’m trying to see about getting it printed.

Also, remember my thoughts about bracing the bed on a Morgan to help with the sag? Well, it turns out that was completely irrelevant in two ways. First, it wasn’t the bed that sagged; it was the arms. Second, Quentin Harley (the genius creator of the Morgan) already fixed that in the firmware. When (If) I finish a Morgan build, I’ll also post info about SAE equivalents and modifications that will need to be made to use these. The most hard to find metric part in the US is the metric PVC and copper or brass pipes. 

Also, I’ll be using Robert Kuhlmann’s Threadless Ball Screw bracket on my build; check out that post on the builder’s forum on Quentin’s site (reprap.harleystudio.co.za/forum=morgan-builders-forum).

Anyway, I’ll post here when I post to Thingiverse; in the meantime, you can find a hint about what it is in the tags on this post.

Leave a comment

Filed under Uncategorized

Back on the Grid! (for now)

Hey Denizens of the RepRap world!


First off, sorry I’ve been off the grid for so long; I’ve had zero time for my hobbies since classes started. My polar printer project is on the backburner for now (I never did much with it except for a few concept sketches, which I may or may not post; they’re really rough and hard to understand); I’m thinking of trying to start development a Morgan derivative over my fall break.  I’m thinking another leadscrew nut and/or another threadless ball screw and a frame brace to stop the bed from sagging on the far side. 

Also, look for a file dump sometime soon; I was hoping to be able to get this model printed, but that didn’t really work out. So, I may post the SCADs and STLs to Thingiverse sometime in the near future. 


As always, thanks for reading!

Leave a comment

Filed under Uncategorized

Build Plates Finished!!!

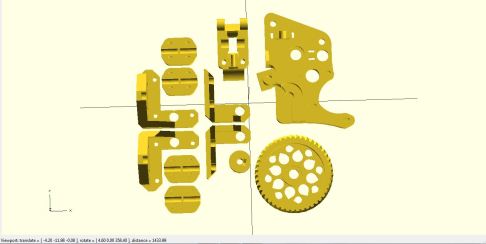
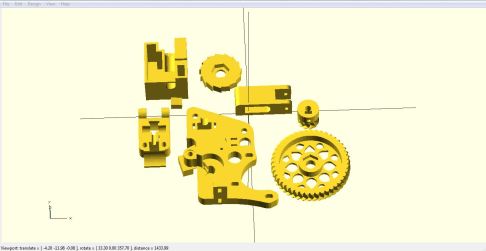
I have finished 5 build plates for a sheet style Prusa i3. These will go up on Thingiverse shortly. One of them has just PLA bushings, enough to have probably 4-5 sets of spares, and of 4 different varieties. Besides the stock parts, this contains a number of upgrades from Thingiverse, which I will try to list here…

So without further ado, I present to you (drumroll,please) PRUSA i3 PLATES!!!!!!!!!!!!!!

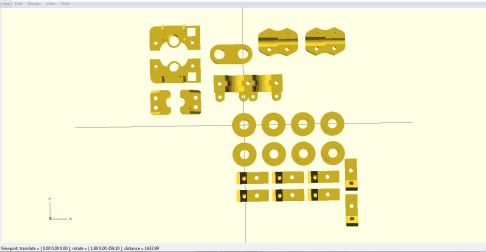
Image

I realize that this is perhaps not the best use of space on the printbed, but I was having some problems with OpenSCAD not rendering properly to export to STL…. I ended up having to use TinkerCAD for bits of the last two plates…

This plate includes Mark Benson’s Dual i3 Bowden Hotend Clamp. It also has Applerust’s PLA Z coupling. I later realized that the Z rods on the Prusa i3 are actually M5. However, I didn’t feel like going back and messing with the SCAD file, and I’m sure that I’ll have some use for them eventually (probably on another printer)….

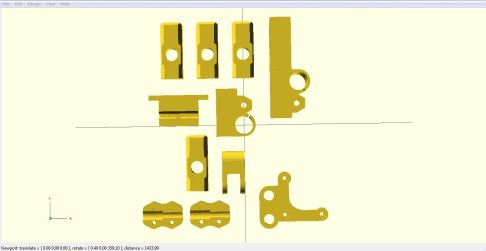
Image

This plate contains another Applerust’s PLA Z coupling, as well as Xoan Sampaino’s i3 Reinforced Y Motor Mount.

Image

This plate contains Woodsmoke’s 3mm version of RichRap’s Bowden Geared ExtruderTriffid_Hunter’s Parametric Herringbone Gear Set for Greg’s Accessible Wade’s,  and a pair of Z couplers (in the correct size) generated from Griffin Nicoll’s Parametric Shaft Coupling script.

Image

This plate contains another Woodsmoke’s 3mm version of RichRap’s Bowden Geared Extruder and Triffid_Hunter’s Parametric Herringbone Gear Set for Greg’s Accessible Wade’s. It also has Richard M’s i3 Y-Idler with Tensioner and Chris Magno’s Indexed Bolt Hobbing Jig for Rotary Tools.

Image

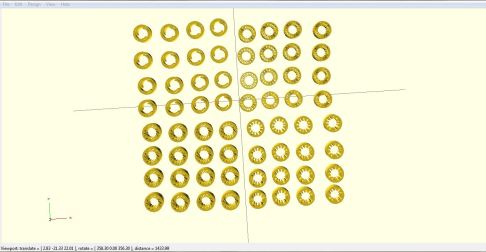
Bushings Bushings Bushing! It includes Jungseo Park’s PLA Printed LM8UU BearingKR2’s Toothed Linear BearingPropsFactory’s IGUS Style Linear Bearings, and Steve Wood’s Self Centering LM8UU Linear Bush.

I will hopefully be able to get some of these parts printed tomorrow, and I’ll post pics once I have them. Until then,  Adios, Amigos!


UPDATE: I forgot one of the bits in there, which is Bernado Baptista’s Prusa i3 Z Smooth Rod Stabilizers. It’s in the first build plate. I’ve also added it as a derivative on Thingiverse.

3 Comments

Filed under i3 Build

Polar Printer Update 2

The shaft that turns the bed will be 30mm thick, and 100-200mm long.It will have a tiered base at the bottom. This base will contain several 6206 bearings, so the shaft can easily turn…

Leave a comment

Filed under Printer Dev

Polar Printer Update

I have some preliminary sketches done for the new polar printer I’m working on right now;

It will basically look like a Printrbot with a circular bed; the bed will be belt-driven and will rest on a thrust bearing. This assembly will be held up by a printed part. The shaft will go through the bottom, and have a pulley on it.

I’m not sure about the belt length, though…

The motor will not be geared down, which means that the whole of the belt will have to pass around the pulleys for the bed to move a whole turn. This means that it will have to use a relatively small length of close-loop belt to turn the bed.I picture the base as having  a “pegboard on it, and you can snap in collumns to add idler pulleys, to tension the belt as needed. I think the best option for the belt driving the bed will be the 1164mm closed loop belt that Adafruit sells….

For the linear axis, of course, the normal belts will be used; I’ll probably cut to size and then measure it…

Leave a comment

Filed under Printer Dev